Brow Lamination Step by Step for Perfect Salon Brows
Over 60 percent of clients say perfectly shaped brows boost their confidence. Brow lamination has become the go-to solution for anyone dreaming of full, lifted brows without daily styling. Whether you are a beauty pro or just learning the basics, understanding each step is key for safe, flawless results that last. This guide explains exactly how to prep, shape, treat, and protect brows so your finished look always impresses.
Table of Contents
- Step 1: Prepare Brows and Gather Supplies
- Step 2: Cleanse and Shape Eyebrows for Treatment
- Step 3: Apply Lifting Solution and Position Hairs
- Step 4: Neutralize and Set Brows Securely
- Step 5: Nourish and Protect the Laminated Brows
- Step 6: Check Results and Advise on Aftercare
Quick Summary
| Key Point | Explanation |
|---|---|
| 1. Perform a patch test beforehand | Always conduct a patch test 24-48 hours prior to lamination to prevent allergic reactions and ensure safety. |
| 2. Cleanse brows thoroughly before treatment | Use a professional makeup remover to eliminate any residue and oils, important for effective lamination. |
| 3. Shape brows carefully | Map and shape brows accurately using a spoolie brush, avoiding over-plucking to maintain natural structure. |
| 4. Apply lifting solution precisely | Use minimal product while positioning hairs; precise application prevents damage and ensures desired results. |
| 5. Educate clients on aftercare | Provide clear aftercare instructions, emphasizing avoiding water and proper serum use to maintain results. |
Step 1: Prepare Brows and Gather Supplies
Brow lamination requires precise preparation and the right tools to achieve stunning salon-style results. According to beautyacademy, the first critical step is thoroughly cleansing the eyebrow area with a professional makeup remover to ensure client suitability and treatment effectiveness.
Your supply checklist should include professional-grade brow lamination solutions, protective eyewear, cotton pads, cleanser, disposable applicators, a small spoolie brush, and skin-friendly barrier cream. NIMA Institute recommends carefully reviewing client documentation and performing a comprehensive skin assessment before beginning the treatment to guarantee safety and optimal results.
Pro tip: Always perform a patch test 24-48 hours before the full brow lamination procedure to check for potential allergic reactions or skin sensitivities. This precautionary step helps prevent adverse responses and ensures a smooth, comfortable experience for your client.
With your supplies prepared and workspace organized, you are now ready to move forward with the precise application techniques that will transform your client’s eyebrows into perfectly sculpted masterpieces.
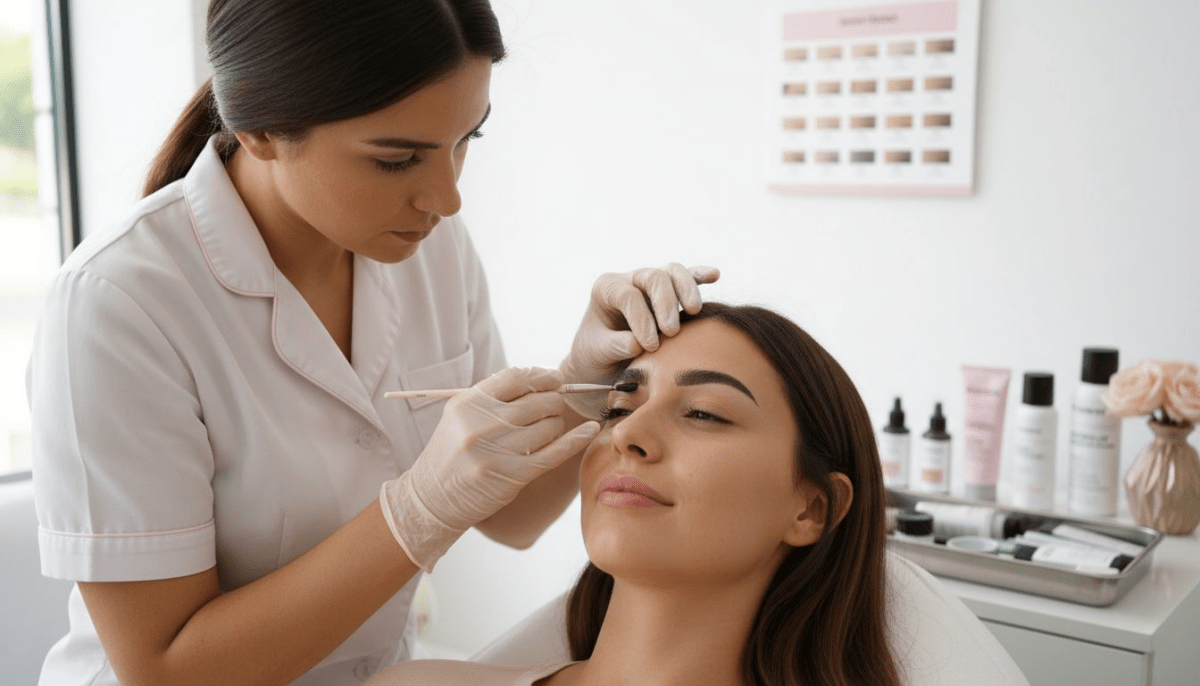
Step 2: Cleanse and Shape Eyebrows for Treatment
Preparing the eyebrows for lamination requires meticulous cleansing and precise shaping to ensure optimal treatment results. beautyacademy emphasizes the critical importance of thoroughly removing all makeup and oils using a professional makeup remover specifically designed to strip away residue without irritating the skin.
According to NIMA Institute, proper brow shaping is fundamental before lamination. Start by mapping out the natural brow shape using a spoolie brush and brow mapping string. Carefully tweeze any stray hairs outside the desired shape and trim longer brow hairs to create a clean consistent line. Use small precision scissors to clip longer hair tips that might interfere with the lamination process while maintaining the brow’s natural volume and character.
Pro tip: Always work with the client’s natural brow architecture. Minimal shaping is key perfect results avoid over plucking or dramatically altering the brow’s inherent shape. Your goal is to enhance and refine the existing brow structure not completely redesign it.
With the brows expertly cleansed and shaped your client is now ready for the next phase of the transformative brow lamination treatment.
![]()
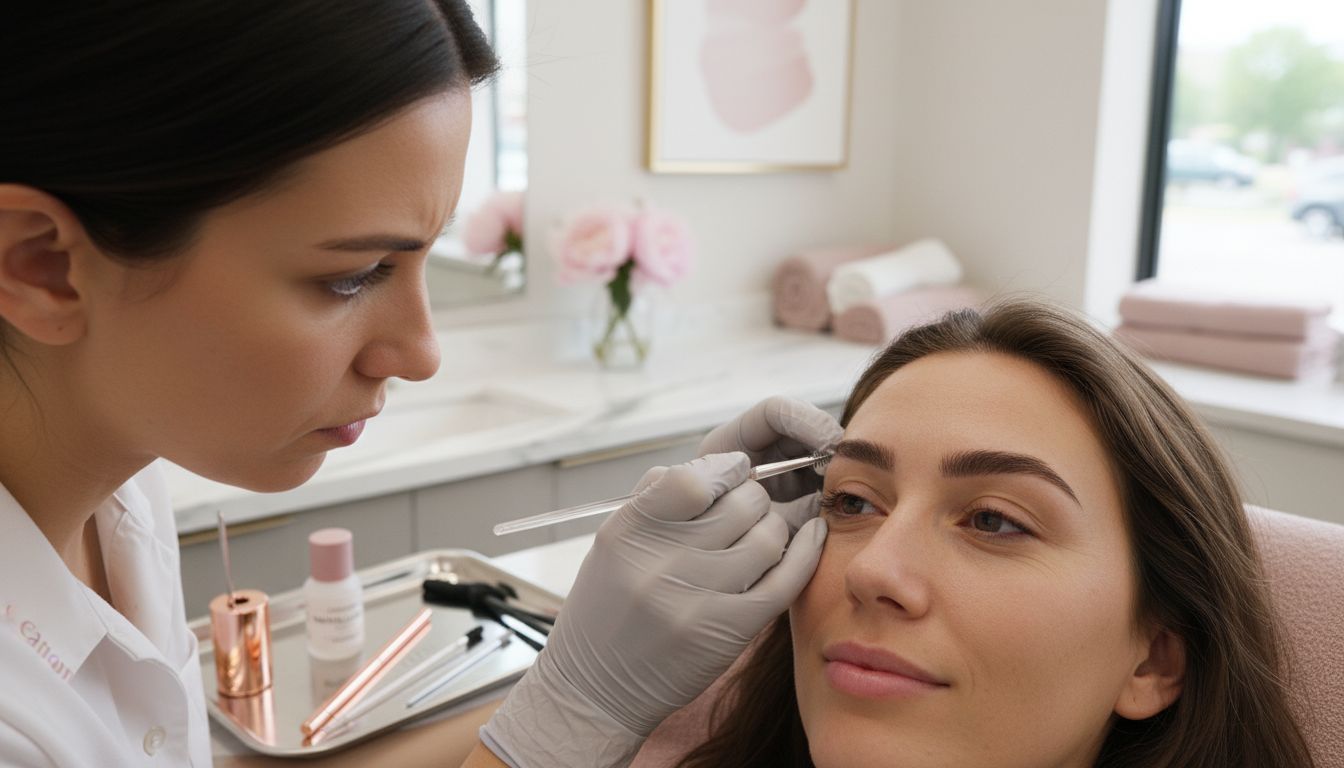
Step 3: Apply Lifting Solution and Position Hairs
Applying the lifting solution is a precise art that transforms your client’s brow shape and texture. beautyacademy recommends applying the lift lotion carefully to one eyebrow at a time using a micro brush to prevent direct skin contact and ensure targeted application.
According to NIMA Institute, positioning the hairs is crucial for achieving the desired brow shape. Begin by applying a thin layer of lifting solution directly to the brow hairs using a clean spoolie brush. Gently brush the hairs upward and outward in the direction you want them to set creating a soft lifted appearance. Work methodically from the inner corner to the tail of the brow ensuring even coverage and smooth directional positioning.
Pro tip: Less is more when applying the lifting solution. Use minimal product and focus on precise application to prevent oversaturation which can compromise the lamination results and potentially damage the hair structure.
With the lifting solution expertly applied and hairs perfectly positioned your brows are now ready for the next transformative stage of the lamination process.
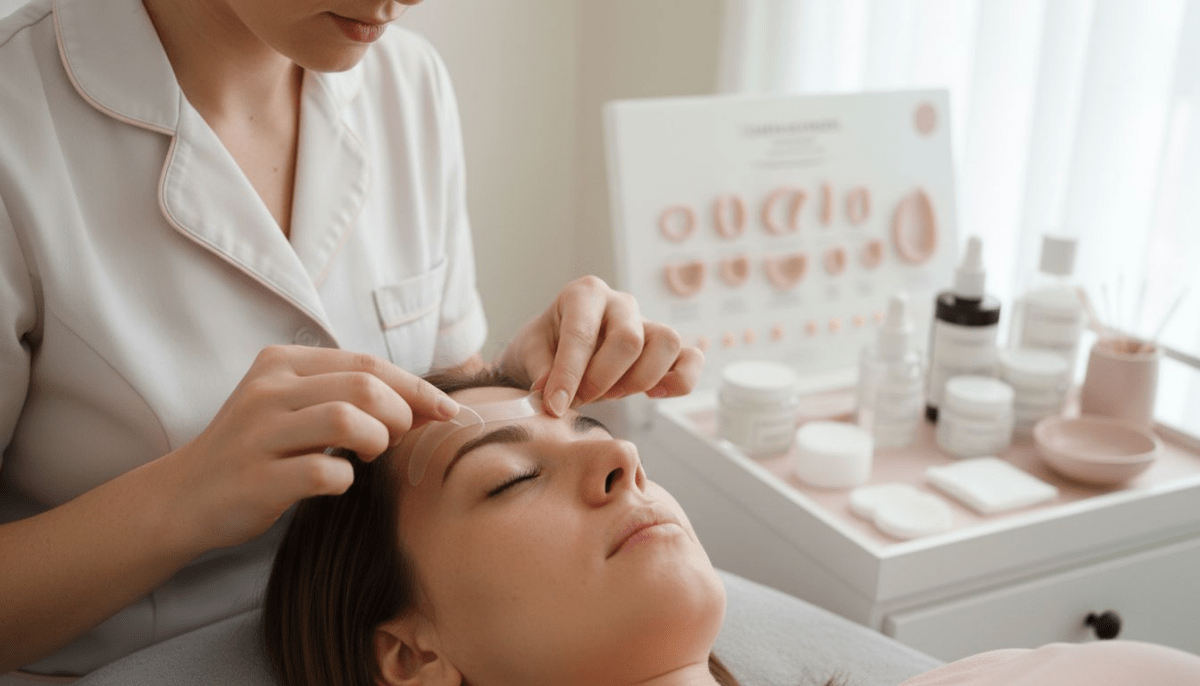
Step 4: Neutralize and Set Brows Securely
The neutralization process is critical for locking in your perfectly shaped brows and ensuring lasting results. beautyacademy recommends a precise technique involving carefully brushing the hairs into the desired lamination direction and using cling film to secure the brow shape during processing.
According to NIMA Institute, applying the neutralizing solution requires methodical attention to detail. Start by gently brushing the neutralizer through the brow hairs using light upward strokes ensuring complete and even coverage. Allow the neutralizer to process for 4 to 6 minutes depending on hair texture and desired hold intensity. The neutralizer works to lock the hairs into their new lifted position while preventing any potential damage to the hair structure.
Pro tip: Maintain consistent brush pressure and direction during neutralization. Uneven application can result in an asymmetrical brow shape or inconsistent lamination results that might disappoint your client.
With the brows securely neutralized and set you are now approaching the final stages of creating stunning salon quality brow lamination.
Step 5: Nourish and Protect the Laminated Brows
Complete guide to Why Brow Lamination Lasts reveals the importance of post-treatment care for maintaining stunning brow results. beautyacademy recommends applying a daily aftercare serum to support brow hair strength, color retention, and overall hair health.
According to NIMA Institute, conditioning treatments are crucial for maintaining the lamination effect and protecting the brow hair structure. Begin by selecting a nourishing brow serum specifically designed for post-lamination care. Gently apply the serum using your fingertips or a clean spoolie brush, focusing on distributing the product evenly from the root to the tip of each brow hair. Allow the serum to absorb completely without rubbing or disturbing the newly laminated shape.
Pro tip: Avoid water and makeup on the brows for at least 24 to 48 hours after treatment to ensure the lamination sets properly and maintains its desired shape and texture.
With your brows carefully nourished and protected your stunning salon quality lamination will look flawless and last longer than traditional brow styling techniques.
Step 6: Check Results and Advise on Aftercare
7 Top Brow Lamination Tips for Perfect Professional Results highlights the critical final stage of the brow lamination process. beautyacademy recommends a thorough visual and tactile assessment to ensure the lamination meets professional standards and client expectations.
According to NIMA Institute, client aftercare education is essential for maintaining long lasting results. Walk your client through a comprehensive aftercare routine that includes avoiding water and steam for the first 24 to 48 hours avoiding touching or rubbing the brows and applying a nourishing brow serum daily. Demonstrate the proper application technique for the aftercare serum and explain how consistent care will help maintain the brow shape and hair health.
Pro tip: Provide your client with a written aftercare instruction card that details specific dos and donts to help them preserve their perfectly laminated brows and extend the treatments longevity.
By carefully reviewing the results and educating your client on proper aftercare you ensure their satisfaction and build trust in your professional brow lamination services.
Achieve Perfect Salon Brows with Professional Brow Lamination Kits
Transforming your clients’ eyebrows into stunning, sculpted masterpieces starts with having the right products. If you want flawless results as described in the “Brow Lamination Step by Step for Perfect Salon Brows” article, you need brow lamination solutions designed for precision and safety. Fraustore USA offers a wide range of Brow Lamination Products for Professionals Buy USA made specifically to help you deliver that perfect lift, shape, and lasting hold every time.

Don’t let inconsistent results or inferior products hold your salon back. Explore our curated selection that includes everything from lifting solutions to nourishing serums. Visit ZOLA USA 12 Brow & Lash Essentials for trusted brands committed to quality and client satisfaction. Ready to elevate your brow lamination service today Visit Fraustore USA and stock your kit with professional-grade products built for flawless application and longer-lasting results.
Frequently Asked Questions
How do I prepare my brows before lamination?
To prepare your brows for lamination, start by thoroughly cleansing the eyebrow area with a professional makeup remover. Follow this by shaping your brows using a spoolie brush and tweezers, ensuring strays are removed and longer hairs are trimmed.
What is the process of applying the lifting solution in brow lamination?
Applying the lifting solution involves using a micro brush to carefully coat one eyebrow at a time, preventing direct skin contact. Use a clean spoolie to brush the hairs upward and outward in your desired direction for a soft lifted appearance.
How long should I let the neutralizer process on my brows?
The neutralizer should process for about 4 to 6 minutes, depending on your hair texture and the level of hold you wish to achieve. Ensure that you consistently brush the neutralizer through the brow hairs during this time for even coverage.
What care should I take after brow lamination?
After brow lamination, it’s crucial to avoid water and makeup on the brows for at least 24 to 48 hours. Apply a nourishing brow serum daily to maintain hydration and protect the brow structure for optimal results.
How can I ensure the best results from my brow lamination?
To achieve the best results, perform a patch test 24-48 hours before the procedure to check for allergies, and maintain minimal shaping of the brows during preparation. Additionally, educate yourself about aftercare to prolong the longevity of the lamination effects.
How often can I get brow lamination done?
You can get brow lamination done every 6 to 8 weeks, allowing enough time for the brow hairs to fully recover and absorb treatment products. Ensure to follow a proper aftercare routine to keep brows healthy and beautiful.