Professional Brow Lamination Workflow for Salon-Quality Results
Did you know that over 60 percent of women consider well-groomed brows essential to their beauty routine? Proper brow lamination can take your look to the next level, but skipping even one prep step could leave you with lackluster results. From setting up your tools to knowing exactly how long to process each hair type, mastering every stage is the difference between eyebrows that wow and brows that miss the mark.
Quick Summary
| Key Point | Explanation |
|---|---|
| 1. Prepare your workspace well | Organize all necessary tools like microbrushes, lifting creams, and cotton pads before starting. This ensures a smooth workflow and efficient treatment. |
| 2. Assess brow type for timing | Tailor lifting solution processing time to hair thickness: 5 min for fine, 7-8 min for thick. This prevents over-processing and damage. |
| 3. Apply the neutralizer evenly | Neutralizer must be applied thoroughly to lock in the brow shape, with timings adjusted for hair thickness to ensure optimal results. |
| 4. Nourish brows post-treatment | Use a moisturizing serum to restore hydration after lamination. This keeps brows healthy and enhances the final appearance. |
| 5. Provide clear aftercare advice | Instruct clients to avoid moisture for 24 hours and recommend daily nourishment to prolong lamination results for up to eight weeks. |
Table of Contents
- Step 1: Prepare Brow Area And Gather Tools
- Step 2: Assess Brow Shape And Apply Lifting Solution
- Step 3: Set Brow Hairs And Apply Neutralizer
- Step 4: Nourish Brows And Perform Final Styling
- Step 5: Verify Results And Advise Aftercare
Step 1: Prepare Brow Area and Gather Tools
Setting up your workspace and prepping the brow area are critical first steps in achieving a professional brow lamination. Think of this stage as your foundation transforming an average treatment into a salon-worthy experience.
Start by creating a clean workspace with all necessary tools within easy reach. According to professional brow lamination guidelines, you’ll want to gather specific items before beginning: microbrushes, cotton pads, spoolies, lifting cream, neutralizing solution, and a nourishing serum. Organize these on a clean tray or workspace to ensure a smooth workflow.
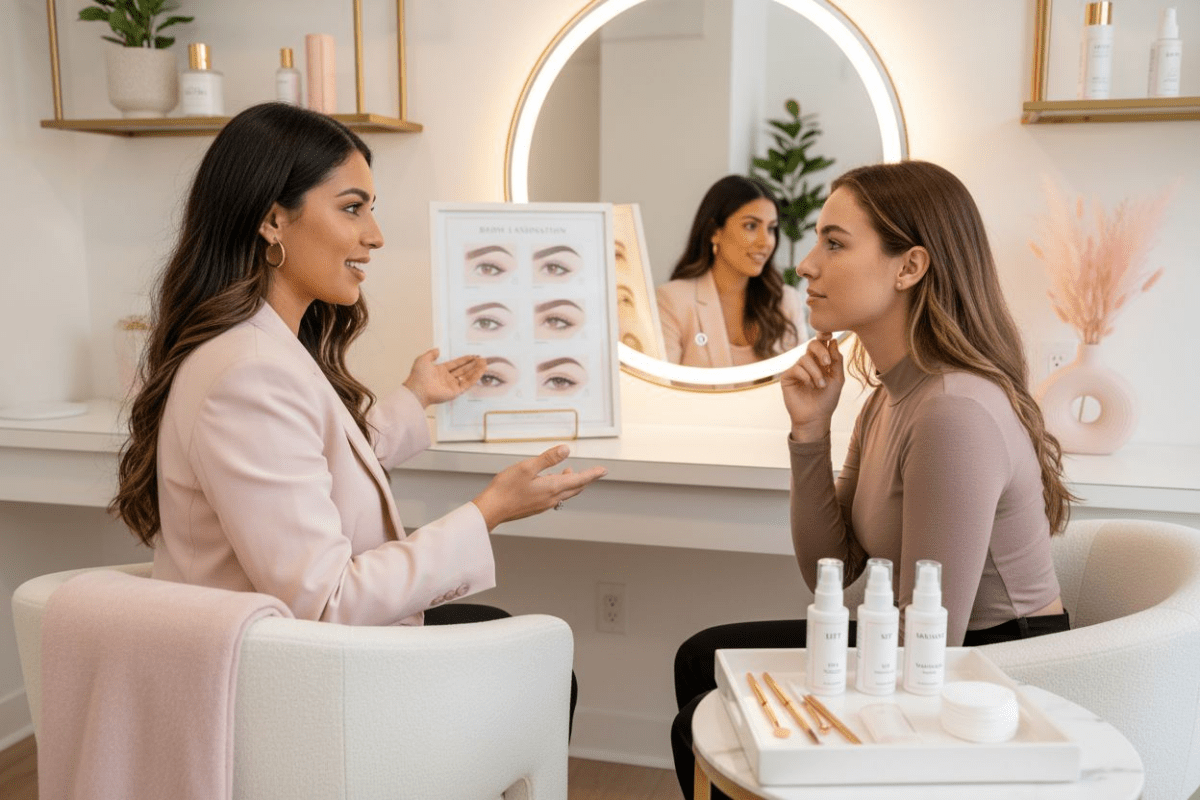
Client consultation is your next priority. Take a moment to discuss the desired brow look and assess their natural brow shape. Carefully cleanse the brow area using a gentle, oil-free cleanser to remove any makeup, skincare products, or natural oils. This step is crucial because residue can prevent the lamination solution from properly processing.
Pro Tip: Always perform a patch test 24 hours before the actual treatment to check for potential allergic reactions. This small step can prevent significant discomfort and potential complications.
Once the brows are thoroughly cleansed, use a clean spoolie to brush the brow hairs into your desired direction. This helps you visualize the final shape and ensures even product application. Read more about professional brow styling techniques for additional insights into creating stunning brow transformations.
With your workspace prepared and brows prepped, you are now ready to move into the exciting lamination process.
Step 2: Assess Brow Shape and Apply Lifting Solution
Now that your workspace is prepared, it is time to transform those brows into a perfectly sculpted masterpiece. This step involves carefully assessing your client’s natural brow shape and strategically applying the lifting solution to create a stunning, uniform look.
Begin by evaluating the natural direction and thickness of the brow hairs. According to professional brow lamination guidelines, the processing time should be tailored to hair thickness. For fine hair, aim for approximately 5 minutes of processing time, while thicker hair might require 7 to 8 minutes.
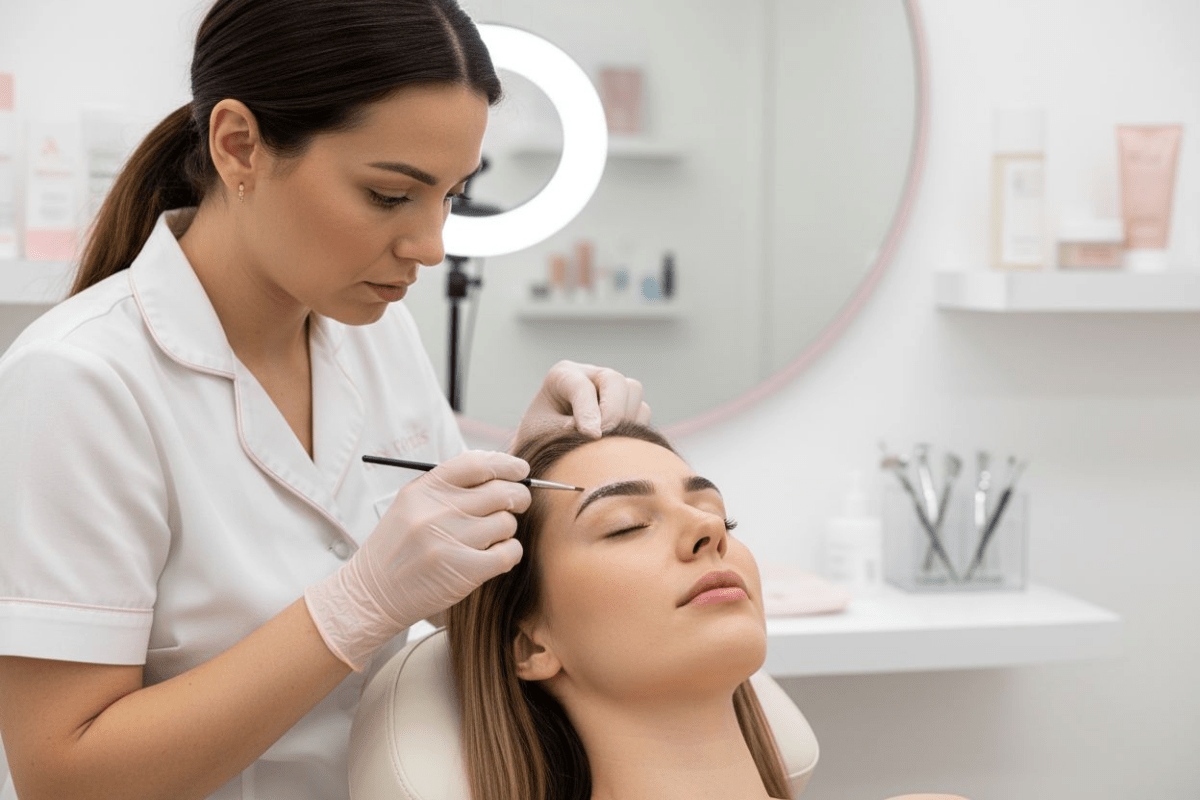
Apply a thin layer of adhesive to help guide the brow hairs into your desired shape. Using a microbrush, gently comb the hairs upward and outward, creating a natural yet polished appearance. Check out our comprehensive guide on brow styling techniques for additional insights into creating perfect brow arches.
Next, carefully apply the lifting cream. Professional techniques recommend focusing on the root area and spreading the product to about three-quarters up the hair shaft. Be precise and methodical, ensuring even coverage without saturating the hairs.
Warning: Timing is everything. Remove the lifting solution immediately when the processing time is complete to prevent over-processing, which can damage the hair structure. Perform a control check by gently bending the hairs to ensure they are malleable but not brittle.

With the lifting solution applied and your brows perfectly positioned, you are now ready to move to the next transformative stage of the lamination process.
Here’s a summary of recommended processing times for different brow hair types during lamination:
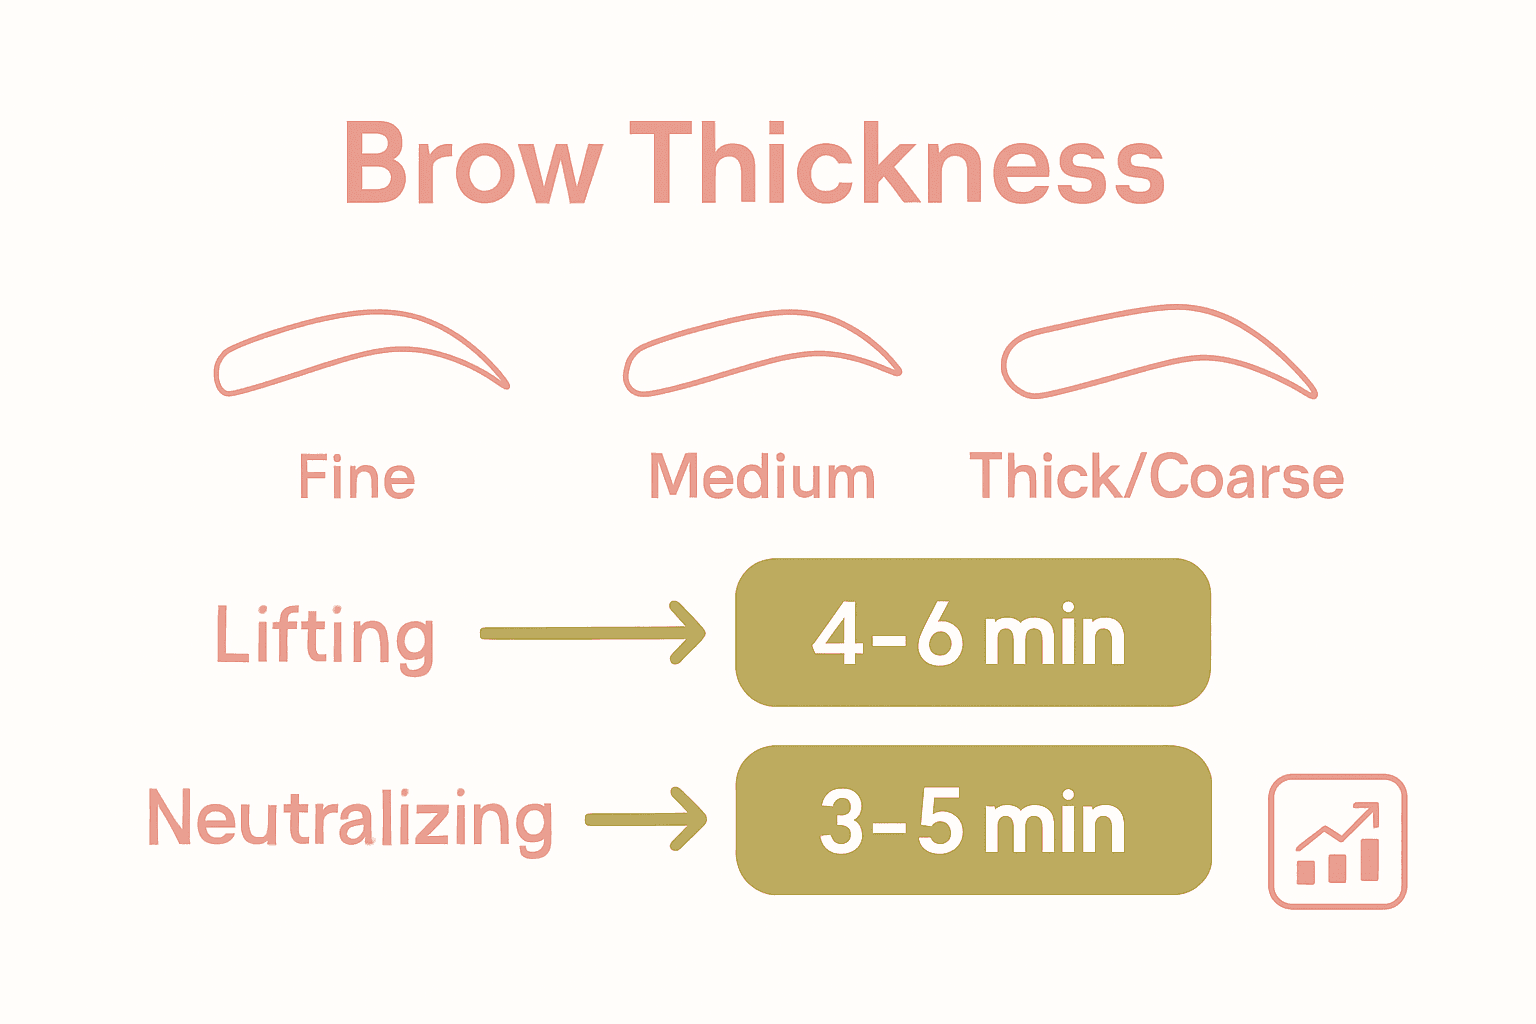
| Hair Type | Lifting Solution Time | Neutralizer Time |
|---|---|---|
| Fine | 5 minutes | Shorter duration |
| Medium | 6-7 minutes | Moderate time |
| Thick/Coarse | 7-8 minutes | Slightly longer |
Step 3: Set Brow Hairs and Apply Neutralizer
With the lifting solution complete, you are now entering a critical stage of brow lamination that will lock in your perfectly shaped brows. This step transforms those beautifully positioned hairs into a structured yet natural-looking masterpiece.
After removing the lifting cream, take a clean spoolie and carefully adjust the brow shape. Aim for perfect symmetry, ensuring each hair is precisely positioned. Professional techniques recommend spending extra time during this adjustment phase to create a flawless final look.
Next, apply the neutralizing solution evenly across the brow area. According to professional brow lamination guidelines, the application should be thorough but not oversaturated. Learn more about professional neutralizing techniques to perfect your approach.
Timing is crucial in this stage. The processing time varies depending on hair thickness and texture. For fine hair, keep the neutralizer on for a shorter duration, while thicker hair might require a slightly longer setting time. Perform a control check by gently attempting to move the brow hairs—they should hold their shape without immediately springing back.
Pro Tip: Some professionals recommend using plastic wrap to cover the brows during neutralization. This technique can help enhance product processing and maintain the desired shape. However, be cautious and follow the specific instructions of your chosen lamination product.
Remove the neutralizer using a dry cotton pad, making sure to be gentle yet thorough. This final step locks in the shape and prepares your brows for the finishing touches that will complete the transformation.
Step 4: Nourish Brows and Perform Final Styling
You have successfully transformed your client’s brows through the intricate lamination process. Now comes the final stage that will ensure your stunning results remain healthy, vibrant, and beautifully maintained.
Begin by applying a generous amount of moisturising serum or keratin nourishing oil. According to professional brow care guidelines, this leave-in product is crucial for restoring hydration and conditioning the brow hairs after the chemical treatment. Explore professional-grade nourishing serums to elevate your brow lamination results.
Using a clean spoolie, gently comb the nourishing product through the brows. This helps distribute the serum evenly while simultaneously refining the shape you have meticulously created. The goal is to maintain the structured yet natural appearance achieved during previous steps.
Pro Tip: If your client has any stray or uneven hairs, now is the perfect moment for minimal trimming. Be conservative and precise—less is always more when it comes to brow grooming. Trim only the tips that disrupt the overall shape to maintain softness and elegance.
Take a moment to assess the final result. The brows should look full, well-defined, and perfectly positioned. No additional rinsing is required after applying the nourishing serum. Your client is now ready to flaunt their beautifully laminated brows with confidence and style.
Step 5: Verify Results and Advise Aftercare
With the brow lamination treatment complete, your final responsibility is to verify the results and provide comprehensive aftercare instructions. This critical step ensures your client maintains their beautiful new brow look and understands how to preserve the treatment.
First, carefully examine the brows in natural and salon lighting. Verify that the shape is symmetrical, the hairs are uniformly positioned, and the overall appearance meets professional standards. Use a handheld mirror to allow your client to see their transformed brows from multiple angles.
According to professional aftercare guidelines, your client must avoid moisture for the first 24 hours following the treatment. Learn more about optimal brow lamination maintenance to provide the most accurate advice.
Pro Tip: Recommend specific aftercare practices. Advise your client to steer clear of steam rooms, saunas, intense workouts, and activities causing heavy sweating during the initial 24-hour period. This helps ensure the lamination solution sets perfectly and the brow shape remains intact.
For long-term maintenance, suggest daily application of nourishing oils like castor oil or specialized brow serums. These products help hydrate the brow hairs and can help extend the lamination results up to eight weeks. Provide your client with specific instructions on gentle application techniques to maintain their brow transformation.
Bring Salon-Quality Brow Lamination to Your Clients Now
Are you tired of struggling with inconsistent results or using brow lamination products that just do not deliver? This article outlined how professional workflow and the right tools are essential for transforming brows into structured, perfected shapes your clients will love. You have seen how every phase – from thorough cleansing and precise lifting solution timing, to correct neutralizer use and targeted nourishment – relies on professional-level products and techniques for success. That is where your journey with salon-quality results truly begins.

Ready to achieve flawless brows every time? Explore the best in class Brow Lamination Products for Professionals and discover brands trusted by top brow artists like ZOLA and OKIS in our ZOLA USA – Brow & Lash Essentials collection. Make your next brow transformation effortless by shopping at Fraustore USA today. Elevate your workflow and give your clients the expert results they expect by acting now while these pro supplies are in stock.
Frequently Asked Questions
What tools are essential for a professional brow lamination workflow?
To achieve salon-quality results in brow lamination, gather microbrushes, cotton pads, spoolies, lifting cream, neutralizing solution, and a nourishing serum. Organize these tools within easy reach before starting the lamination process for a smooth workflow.
How do I determine the processing time for lifting and neutralizing solutions during brow lamination?
Processing time depends on the thickness of the brow hairs. For fine hair, aim for about 5 minutes for the lifting solution and a shorter duration for the neutralizer; thicker hair may require 7 to 8 minutes for lifting and a slightly longer neutralizing time.
What steps should I follow for aftercare after a brow lamination treatment?
Advise clients to avoid moisture for the first 24 hours after treatment. Recommend they stay away from steam, saunas, intense workouts, and excessive sweating to ensure the lamination solution sets perfectly and maintains the desired shape.
How can I create a natural look when applying the lifting solution in brow lamination?
To achieve a natural look, apply a thin layer of lifting cream focusing on the root area and brush the hairs upward and outward with a microbrush. This technique helps shape the brows while maintaining a polished appearance.
What are the signs of over-processing during the brow lamination process?
Signs of over-processing include brittleness and excessive stiffness in the brow hairs after applying the lifting solution. If the brow hairs feel brittle, remove the lifting solution immediately to prevent further damage and maintain brow health.
How can I assess the final results of a brow lamination treatment?
Carefully examine the shape and symmetry of the brows in different lighting. They should appear uniformly shaped and well-defined, allowing clients to view their transformed brows from multiple angles using a handheld mirror.