Professional Lash Lift Steps for Salon-Quality Results
Nearly 80 percent of clients experience better, longer-lasting lash lift results when their technician follows a step-by-step process from the very start. Each part of a lash lift matters, but how you prep, lift, and protect those lashes sets the stage for safe, eye-catching transformations. Whether you work in a busy salon or you are just starting out, understanding what happens at every stage can help you achieve flawless results your clients will love.
Table of Contents
- Step 1: Prepare Lashes And Work Area
- Step 2: Apply Lifting Solution And Shields
- Step 3: Set And Neutralize Lash Curl
- Step 4: Tint And Nourish Lifted Lashes
- Step 5: Check Results And Ensure Aftercare
Quick Summary
| Key Point | Explanation |
|---|---|
| 1. Thoroughly Clean Lashes and Workspace | Proper hygiene is essential to prevent infections and ensure effective treatment results. Always clean before starting the lash lift process. |
| 2. Use the Correct Silicone Shields | Choosing the right shield size is crucial for achieving the desired curl. Match the shield to the client’s natural lash length for best results. |
| 3. Follow Precise Neutralization Timing | Timing during neutralization is critical to avoid damaging lashes. Adhere strictly to product instructions to achieve optimal curl without brittleness. |
| 4. Apply Tint Evenly and Carefully | Tint enhances lash appearance. Make sure to apply the color from root to tip for uniform coverage according to manufacturer guidelines. |
| 5. Provide Detailed Aftercare Instructions | Educate clients on post-treatment care to maintain results. Clients should avoid water and steam for 24 hours to let the lift set properly. |
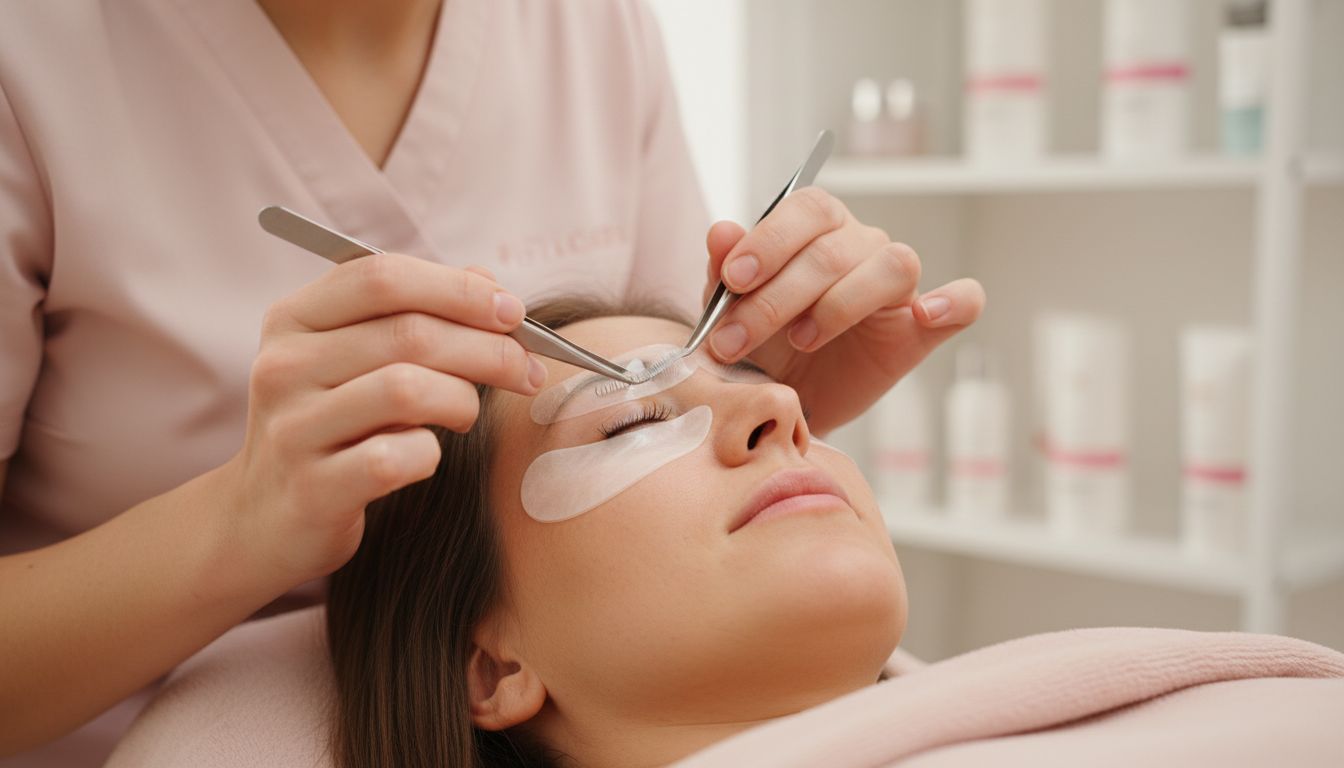
Step 1: Prepare Lashes and Work Area
Preparing your work area and client’s lashes is the critical first step in achieving a professional lash lift. This initial phase sets the foundation for a successful and hygienic treatment that ensures both safety and optimal results.
According to Thames College, thorough cleansing and maintaining strict salon hygiene standards are paramount before beginning any lash lift procedure. Start by sanitizing your entire workspace with professional grade disinfectant. Lay out all necessary tools and products on a clean, organized tray positioned within easy reach. This includes lash lift solution, silicone pads, micro brushes, cleanser, protective eye patches, and tweezers.
Carefully cleanse the client’s lashes using a specialized makeup remover and oil free cleanser. Remove all traces of makeup mascara and natural oils to ensure proper solution adhesion. Gently pat the lashes dry using lint free applicators. Health & Fitness Online recommends conducting a brief client consultation at this stage to confirm no allergies or sensitivities exist that might compromise the treatment.
Warning: Never rush through preparation. Inadequate cleaning or disinfection can lead to potential eye infections and compromise treatment quality. Take your time and be meticulous in each step.
Once your workspace is pristine and the client’s lashes are perfectly prepped. you are now ready to move forward with the actual lash lift application process.
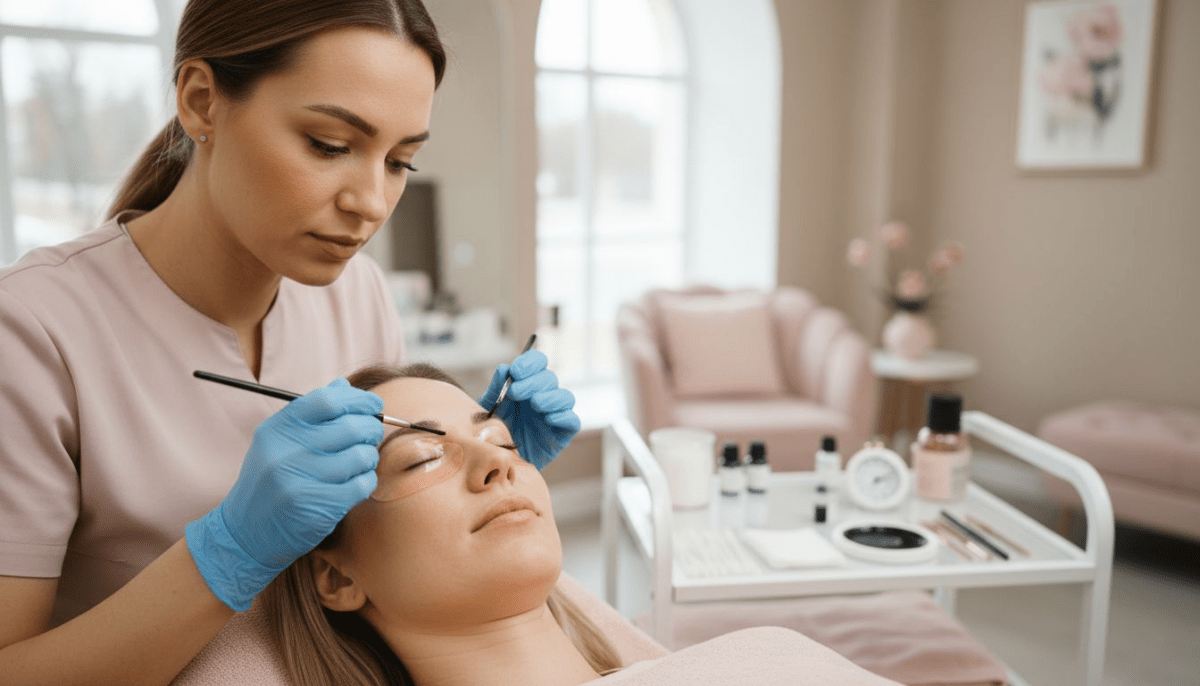
Step 2: Apply Lifting Solution and Shields
Now that your workspace and client’s lashes are perfectly prepared, it’s time to apply the lifting solution and shields for transforming your client’s lashes. This critical stage determines the final curl and shape of the lashes.
According to Thames College, selecting the appropriate silicone shield is crucial for achieving the desired curl effect. Choose a shield size that matches your client’s natural lash length and desired lift intensity. Carefully position the shield on the eyelid using a gentle adhesive, ensuring it sits comfortably and securely without causing any client discomfort.
Health & Fitness Online recommends applying the lifting solution systematically. Using a micro brush, coat the lashes thoroughly but sparingly. Start at the base of the lashes and work toward the tips with precise brush strokes. Avoid oversaturating the lashes to prevent solution runoff and potential eye irritation.
Warning: Always perform a patch test and ensure the client has no allergic reactions before applying any chemical solutions. Watch the processing time carefully to prevent over processing which can damage the lashes.
Once the lifting solution has been applied and processed according to manufacturer instructions, you will be ready to move on to the next critical step in the lash lift procedure.
Step 3: Set and Neutralize Lash Curl
After applying the initial lifting solution, the next crucial step is setting and neutralizing the lash curl to lock in the desired shape and ensure long lasting results. This phase transforms your client’s lashes from flat to beautifully lifted and defined.
Thames College emphasizes the precision required when applying neutralizing agents. Carefully remove the initial lifting solution using a clean micro brush. Then apply the neutralizer systematically starting from the lash roots and working toward the tips. Ensure complete and even coverage to prevent uneven curl or potential lash damage.
Health & Fitness Online recommends maintaining strict timing protocols during neutralization. Leave the neutralizer on for the exact duration specified by the product manufacturer typically between 5 to 7 minutes. Watch the clock carefully and avoid over processing which can lead to brittle or damaged lashes.
Warning: Neutralization timing is critical. Even 30 seconds too long can compromise the lash structure and client results. Always follow manufacturer instructions precisely and monitor the process closely.
Once the neutralization process is complete and the lashes are set, you will be ready to move on to the final nourishing and finishing steps of the lash lift treatment.
Step 4: Tint and Nourish Lifted Lashes
With the lash lift complete, the final transformative steps involve tinting and nourishing your client’s newly elevated lashes. This stage not only enhances the visual impact but also ensures the long-term health and vibrancy of the treated lashes.
Thames College recommends applying tint strategically to create depth and definition. Choose a tint color that complements your client’s natural lash and skin tone. Apply the tint carefully using a small applicator brush, ensuring complete and even coverage from root to tip. Allow the tint to process according to manufacturer instructions typically between 8 to 10 minutes.
Health & Fitness Online emphasizes the importance of post-treatment nourishment. After tinting, apply a specialized lash conditioning serum that replenishes moisture and provides essential nutrients. Gently brush the serum through the lashes using a clean micro brush, focusing on hydrating the lash roots and preventing potential brittleness.
Warning: Always perform a patch test before applying tint to check for potential allergic reactions. Some clients may have sensitive skin or react to specific pigments.
Once the tinting and nourishing process is complete, your client will leave with beautifully lifted, darkened, and conditioned lashes that can last several weeks.
Step 5: Check Results and Ensure Aftercare
With the lash lift treatment complete, the final crucial step involves carefully reviewing the results and providing comprehensive aftercare instructions to your client. This ensures the longevity of the treatment and client satisfaction.
Ogle School provides critical guidance on immediate post-treatment care. Instruct your client to avoid water, steam, makeup, and excessive touching of the lashes for the first 24 hours. This crucial waiting period allows the lash lift solution to fully set and stabilize the new curl shape.
Health & Fitness Online emphasizes the importance of a thorough final review. Examine the lashes under good lighting to check for evenness of curl, symmetry, and overall appearance. Demonstrate to the client how to brush their lashes gently and discuss expected maintenance to preserve the lift.
Warning: Clients should avoid oil-based makeup removers, mechanical eyelash curlers, and intense heat or moisture for at least 48 hours after the treatment. These can compromise the lift and potentially damage the newly treated lashes.
Provide your client with a written aftercare sheet and verbally walk them through the care instructions to ensure they understand how to maintain their beautiful new lash lift.
![]()
Achieve Salon-Quality Lash Lifts with Professional Products
Mastering the professional lash lift steps is essential for creating stunning, lasting results that your clients will love. However the right high-quality products are just as crucial to address challenges like achieving the perfect curl setting avoiding over processing and ensuring a smooth tint application. When you use trusted solutions designed for precision and safety you can confidently deliver impeccable results every time.
Explore our selection of Professional Lash Lift Compounds and Lash Lift Glues & Balms for Professionals to fully support every step from lift to tint and nourishment.
Boost your lash lift services today with products that enhance safety and effectiveness. Visit Fraustore USA now to find everything you need and begin crafting gorgeous lifts your clients will return for again and again.
Frequently Asked Questions
What are the essential steps for a professional lash lift?
To achieve salon-quality results, the essential steps for a professional lash lift include preparation of the client’s lashes and workspace, applying the lifting solution and silicone shields, setting and neutralizing the lash curl, tinting and nourishing the lashes, and checking the results while providing aftercare instructions. Follow each of these steps carefully to ensure quality and safety during the treatment.
How do I prepare my workspace for a lash lift?
Prepare your workspace by sanitizing with a professional-grade disinfectant and organizing all necessary tools and products on a clean tray. Lay out items such as the lash lift solution, silicone pads, micro brushes, and protective eye patches for easy access during the procedure.
How long should the lifting solution be applied for optimal results?
The lifting solution should be applied according to the manufacturer’s instructions, typically for around 5 to 12 minutes depending on the specific product used. Always watch the processing time closely and avoid over-processing to protect the client’s lashes.
What should I include in aftercare instructions for lifted lashes?
Aftercare instructions should include avoiding water, steam, and makeup for the first 24 hours, and steering clear of oil-based makeup removers. Remind the client to avoid mechanical curlers and intense heat for at least 48 hours to maintain their beautiful new lash lift.
How can I ensure my client has no allergies before the lash lift?
Conduct a brief client consultation before starting the lash lift procedure to check for allergies or sensitivities to any of the products used. Perform a patch test with the lifting solution to confirm there are no adverse reactions before applying it to the lashes.
What is the importance of cleansing the client’s lashes before a lift?
Cleansing the client’s lashes is crucial for ensuring that all makeup, natural oils, and impurities are removed. This step allows for better adhesion of the lifting solution, leading to more effective results and minimizing the risk of irritation.
