Eyebrow Tinting Guide: Achieve Salon-Quality Results Easily
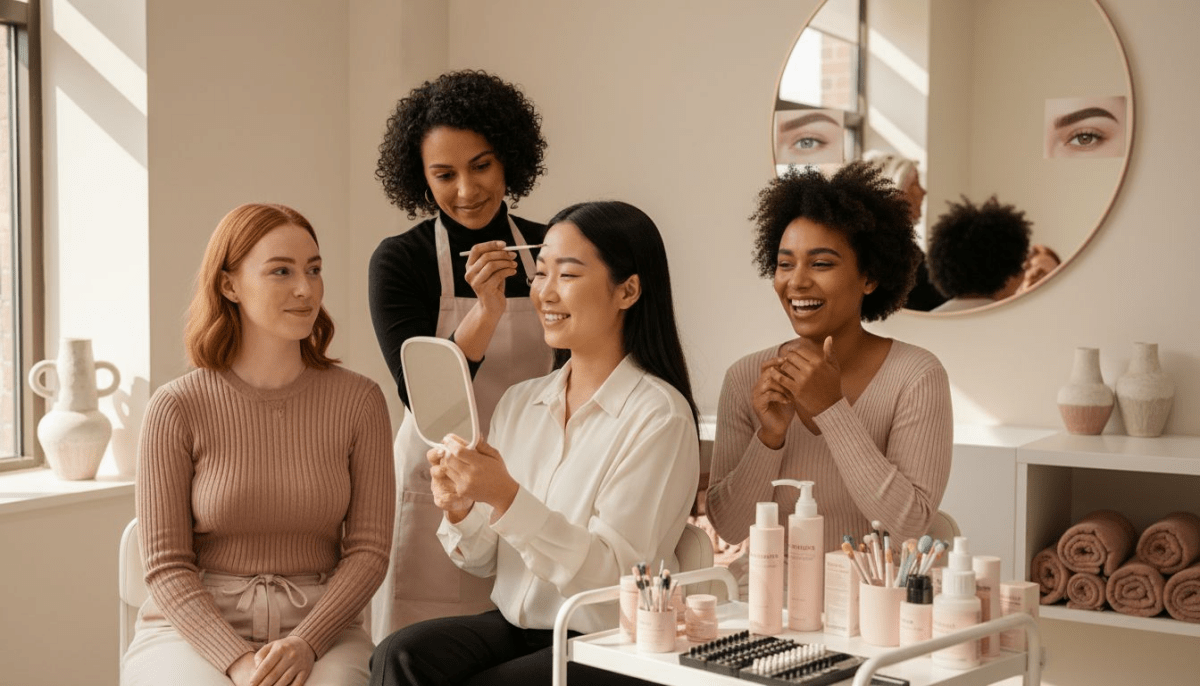
Nearly 70 percent of people feel more confident with well-groomed brows, yet many struggle to achieve that polished look at home. Eyebrow tinting offers a simple way to enhance your natural features without daily makeup. With the right steps and a little care, you can create salon-worthy brows that last for weeks while saving time each morning.
Table of Contents
- Step 1: Prepare Brows and Select Tint Shade
- Step 2: Mix Tint and Set Up Application Area
- Step 3: Apply Tint Evenly to Eyebrows
- Step 4: Monitor Processing Time and Remove Tint
- Step 5: Check Color Result and Perform Aftercare
Quick Summary
| Key Point | Explanation |
|---|---|
| 1. Perform a skin sensitivity test | Conduct a 48-hour skin test to prevent allergic reactions to the tint or developer. |
| 2. Choose the right tint shade | Select a color that is one to two shades different from your natural eyebrows for a natural look. |
| 3. Mix tint precisely and prepare tools | Accurately combine tint with the developer and set up a sanitized workspace for effective application. |
| 4. Apply tint evenly for best results | Use a mascara wand to ensure uniform coverage and maintain symmetry throughout the brow. |
| 5. Follow specific processing and aftercare | Monitor processing time carefully and apply aftercare to preserve color vitality for weeks. |
Step 1: Prepare Brows and Select Tint Shade
Preparing your brows and selecting the perfect tint shade is crucial for achieving professional results. In this step, you will learn how to set up your workspace, conduct a preliminary skin test, and choose a flattering eyebrow color that complements your natural features.
Begin by gathering all essential supplies for your eyebrow tinting session. According to eric.ed.gov, you will need a few key items: towels, a protective cape, cotton balls, petroleum jelly, and a professional eyebrow tint kit. Before diving into the tinting process, it is critical to perform a 48-hour skin sensitivity test. As realnaturalhealth.org recommends, this test helps prevent potential allergic reactions to the dye or developer.
When selecting your tint shade, consider your natural hair color and skin undertones. Aim for a color that is one to two shades lighter or darker than your current eyebrow color to create a natural look. Avoid going too dark or too light, which can appear unnatural. Gently clean the eyebrow area with a mild cleanser to remove any oils or makeup residue before application. This ensures better tint absorption and a more even result.
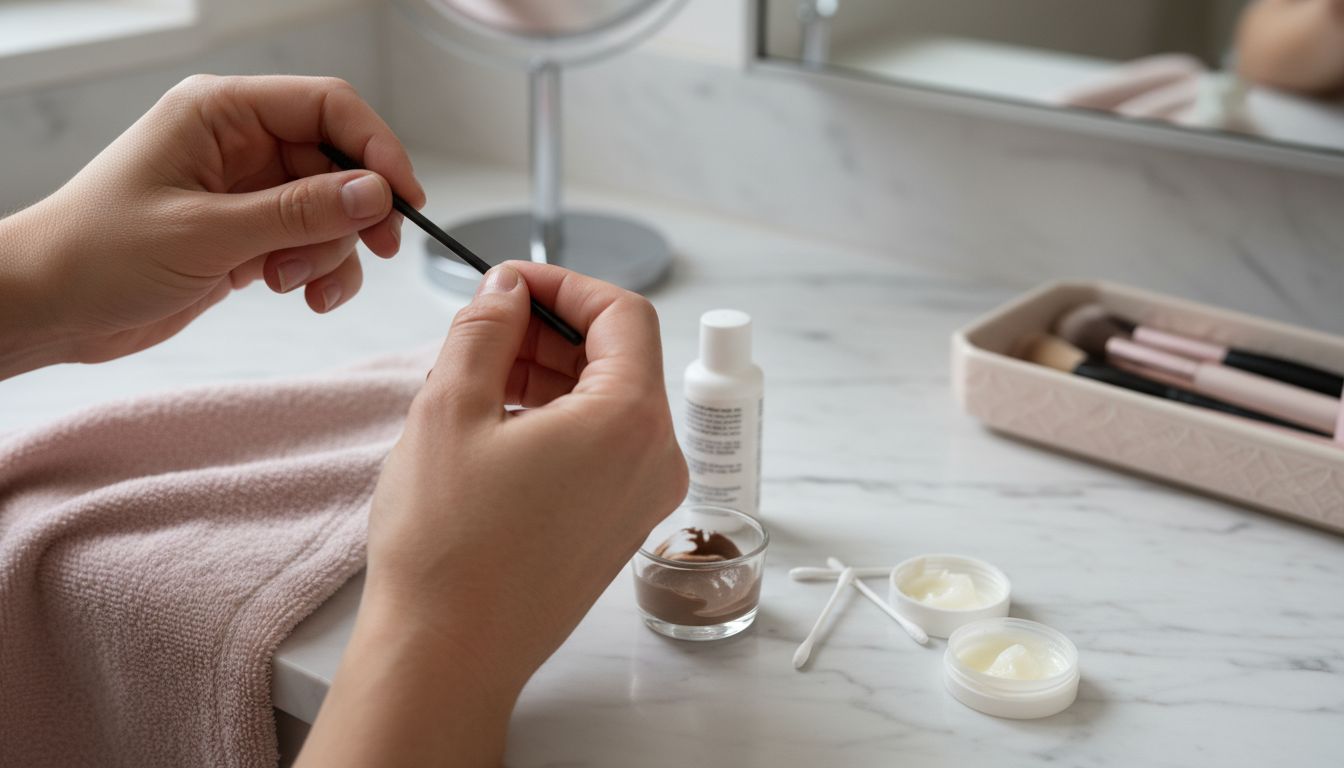
Step 2: Mix Tint and Set Up Application Area
Now that you have prepared your brows and selected the perfect tint shade, it is time to mix the tint and set up a professional application area. This crucial step ensures precise color mixing and a clean workspace for achieving salon-quality results.
According to coursecloud.org, start by squeezing a bean-sized amount of the chosen tint into a designated mixing cup. Carefully add the recommended amount of activating agent as specified by your specific brand. Mix the tint and developer thoroughly until you achieve a smooth and consistent texture. Be precise with your measurements to ensure the right color intensity and longevity.
Prepare your application area by sanitizing all tools and arranging them within easy reach. As recommended by eric.ed.gov, position your client at a comfortable 45-degree angle and drape a towel over their neck and chest to protect clothing during the tinting process. Have cotton swabs, petroleum jelly, and clean applicator brushes ready. Pro tip: Use petroleum jelly around the eyebrow area to create a protective barrier that prevents tint from staining the surrounding skin. You are now ready to move on to the actual tint application.
Step 3: Apply Tint Evenly to Eyebrows
With your tint mixed and workspace prepared, you are now ready to apply the color to your eyebrows. This critical step requires precision, patience, and a steady hand to achieve professional results that enhance your natural brow shape.
According to coursecloud.org, begin by brushing your eyebrows straight with an eyebrow comb to prepare the hair for even tint application. Using a mascara wand, carefully apply the tint by rolling the wand over the brow hairs to ensure comprehensive and uniform coverage. Work swiftly but methodically to prevent uneven color absorption. Learn more about eyebrow tinting techniques in our comprehensive guide on eyebrow treatments.
Following the guidance from eric.ed.gov, use a cotton-tipped applicator to apply the tint along the natural brow line. Apply the tint systematically, moving against the brow direction to guarantee thorough coverage. Repeat this process on each eyebrow, ensuring symmetry and consistent color intensity. Pay close attention to sparse areas, building up color gradually to avoid an overly dark or unnatural appearance. After application, allow the tint to process according to the manufacturer’s recommended time to achieve your desired brow color.
Step 4: Monitor Processing Time and Remove Tint
Now that the tint has been applied, you enter a critical phase of the eyebrow tinting process. Precise timing and careful removal will determine the final color and quality of your results.
According to realnaturalhealth.org, the typical processing time ranges from 10 to 20 minutes, depending on the intensity of color you want to achieve. For darker shades, you might extend the time up to two hours. However, it is crucial to strictly follow the specific instructions provided in your tint kit to prevent overdevelopment or unintended color results. Check out our comprehensive guide on eyebrow tinting techniques for more professional insights.
When it is time to remove the tint, follow the method recommended by coursecloud.org. Start by using a tissue to wipe off the majority of the tint from the first eyebrow applied. Then, use a damp cotton pad folded into a quarter and wipe against the hair growth in firm strokes. This technique ensures thorough and even tint removal while maintaining the precise shape and definition of your eyebrows. Repeat the process on the second eyebrow, checking the color and symmetry to ensure your desired result.
Step 5: Check Color Result and Perform Aftercare
Congratulations on completing your eyebrow tinting process. This final step is crucial for ensuring your new brow color looks perfect and remains vibrant for weeks to come.
According to lashandbrowroom.org, the first thing you should do is provide a mirror to assess the results carefully. The typical tint longevity ranges between 2 to 6 weeks, and professionals recommend scheduling maintenance every 4 to 6 weeks to keep your brows looking fresh. Lock in your stunning new tint with our professional color sealing solution.
Following the guidance from realnaturalhealth.org, carefully rinse your eyebrows with warm water and gently pat them dry. Avoid rubbing the area to prevent potential skin irritation. For optimal results, apply a minimal amount of fragrance-free moisturizer around the brow area and avoid excessive water exposure or oil-based products for the first 24 hours. This will help preserve the tint and ensure your beautifully enhanced eyebrows remain vibrant and well-defined.
![]()
Master Salon-Quality Eyebrow Tinting with Professional Products
Achieving perfectly tinted eyebrows that enhance your natural beauty starts with using the right tools and shades. This guide highlighted challenges like selecting the ideal tint shade, mixing precise colors, and applying tint evenly for flawless results. If you want to avoid uneven color, allergic reactions, or short-lived tint effects, it is essential to choose professional-grade products designed for long-lasting wear and safety.
Discover trusted solutions with our Brow Tinting & Dyes | Long-Lasting Professional Colors collection that provide vibrant results with every application.

Take control of your beauty routine today and enjoy salon-quality results you can trust. Shop now at Fraustore USA for reliable brow tint kits and perfect your craft with expert supplies tailored for beauty professionals and enthusiasts alike. Elevate your tint game and never worry about uneven or short-lasting brows again.
Frequently Asked Questions
How do I prepare my brows for tinting?
To prepare your brows for tinting, gather essential supplies such as towels, a protective cape, and petroleum jelly. Clean the brow area with a mild cleanser to ensure better tint absorption before proceeding with the tint application.
What shade should I choose for eyebrow tinting?
Select a tint shade that is one to two shades lighter or darker than your natural eyebrow color. This helps achieve a natural look while enhancing your features; aim for a shade you feel will complement your overall appearance.
How long should I leave the tint on my brows?
The typical processing time for eyebrow tint ranges from 10 to 20 minutes, depending on the intensity desired. Always check the manufacturer’s instructions to avoid overdevelopment and ensure proper color results within this timeframe.
What aftercare should I follow post-tinting?
After tinting, rinse your eyebrows with warm water and gently pat them dry. Avoid excessive water exposure or oil-based products for the first 24 hours to maintain the tint’s vibrancy and longevity.
How often should I tint my eyebrows for the best results?
For optimal results, schedule eyebrow tint maintenance every 4 to 6 weeks. This frequency helps keep your brows looking fresh and ensures the color remains vibrant throughout the duration.
What tools do I need for a successful eyebrow tinting session?
Essential tools for eyebrow tinting include a mixing cup, applicator brushes, cotton swabs, and a mascara wand for precise application. Gather these tools to ensure an organized and efficient tinting process.